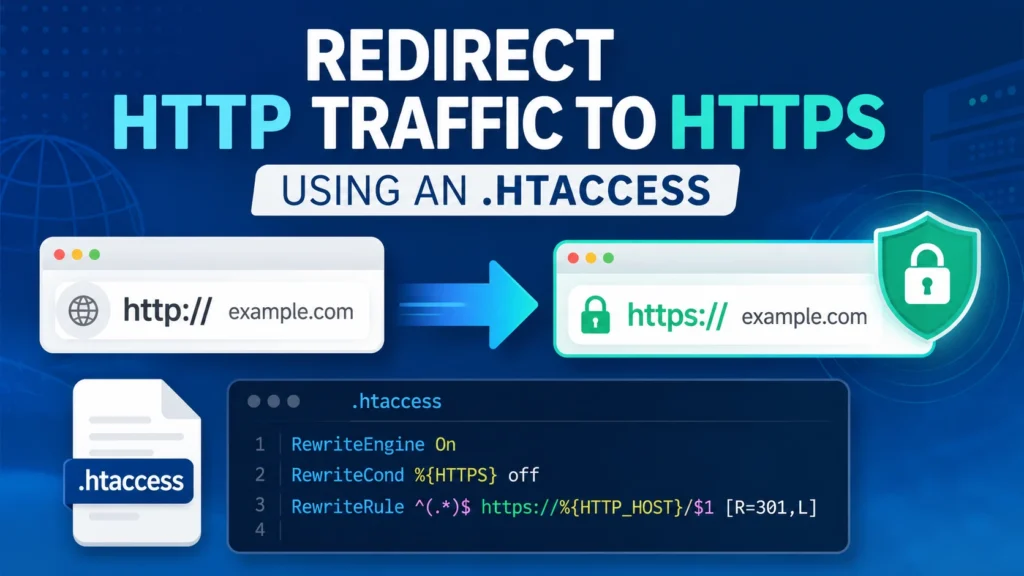
Redirecting HTTP to HTTPS using .htaccess is one of the most common website security and SEO tasks for Apache-based websites. When your SSL certificate is active, your website should load securely with https:// instead of the older http:// version.
However, simply installing an SSL certificate is not always enough. In many cases, visitors can still open the non-secure HTTP version unless you force the browser and search engines to use HTTPS.
In this guide, I will show you how to redirect all HTTP traffic to HTTPS using an .htaccess file. I will also explain how to redirect a single page, how to test the redirect, how to avoid redirect loops, and what WordPress users should check after enabling HTTPS.
What Is an HTTP to HTTPS Redirect?
An HTTP to HTTPS redirect sends users from the non-secure version of a URL to the secure version.
For example:
http://example.comredirects to:
https://example.comThis redirect is usually done with a 301 permanent redirect. A 301 redirect tells browsers and search engines that the secure HTTPS version is the preferred and permanent version of the page.
Google recommends using 301 Moved Permanently when the HTTPS version is canonical, and Apache’s official documentation explains that the [R] flag issues an HTTP redirect while [R=301] makes the redirect permanent.
Why You Should Force HTTPS
HTTPS is important because it helps protect the connection between the visitor’s browser and your website. It is especially important when your website includes:
- Contact forms
- Login pages
- Checkout pages
- Payment forms
- Membership areas
- CRM or lead-generation forms
- Admin dashboards
In addition, HTTPS improves visitor trust. Most modern browsers warn users when a website is not secure. Therefore, even a simple blog or business website should use HTTPS properly.
Google has also confirmed HTTPS as a ranking signal, although content quality and overall relevance remain more important.
Before You Edit the .htaccess File
Before making changes, take a few precautions. A small mistake in the .htaccess file can break your website or cause a redirect loop.
Check These First
- Confirm your SSL certificate is active
Visit your website usinghttps://. If the page does not load, fix the SSL certificate first. - Back up your .htaccess file
Download a copy before editing. This allows you to restore the previous version if anything goes wrong. - Use FTP, cPanel File Manager, or hosting file manager
You can usually find.htaccessin the root folder of your website. - Clear cache after changes
If you use WordPress caching, Cloudflare, LiteSpeed Cache, WP Rocket, or another cache system, clear the cache after editing. - Test in an incognito browser
Browser cache can hide redirect problems. Incognito mode gives a cleaner test.
Best .htaccess Code to Redirect All HTTP Traffic to HTTPS
Use the following code near the top of your .htaccess file:
# Redirect all HTTP traffic to HTTPS
RewriteEngine On
RewriteCond %{HTTPS} off
RewriteRule ^(.*)$ https://%{HTTP_HOST}%{REQUEST_URI} [R=301,L]
This code checks whether the request is using HTTP. If HTTPS is off, Apache redirects the visitor to the same domain and same URL path using HTTPS.
For example:
http://example.com/about/becomes:
https://example.com/about/This keeps the full page path, query string, and domain intact.
What Each Line Means
Let’s break down the code.
RewriteEngine On
RewriteEngine OnThis enables Apache’s rewrite engine. Without this line, your rewrite rules may not work.
RewriteCond %{HTTPS} off
RewriteCond %{HTTPS} offThis condition checks whether the current request is not using HTTPS.
RewriteRule
RewriteRule ^(.*)$ https://%{HTTP_HOST}%{REQUEST_URI} [R=301,L]This line redirects the visitor to the HTTPS version of the same URL.
The flags mean:
R=301means permanent redirect.Lmeans this is the last rule Apache should process for this request.
Apache’s mod_rewrite module is designed to rewrite or redirect URLs using rule-based conditions.
Redirect a Single Page from HTTP to HTTPS
Sometimes you may want to redirect only one page instead of the full website. For example, you may only want to force HTTPS on a login page, checkout page, or form page.
Use this format:
# Redirect a single page from HTTP to HTTPS
RewriteEngine On
RewriteCond %{HTTPS} off
RewriteRule ^contact/?$ https://www.example.com/contact/ [R=301,L]
Replace contact with your page slug and replace the domain with your actual website address.
For example:
http://www.example.com/contact/will redirect to:
https://www.example.com/contact/Redirect HTTP to HTTPS and Non-WWW to WWW Together
In many cases, you may want one final canonical version of your website.
For example:
https://www.example.comIf you want to force both HTTPS and WWW, use this code:
# Redirect HTTP to HTTPS and non-www to www
RewriteEngine On

RewriteCond %{HTTPS} off [OR]
RewriteCond %{HTTP_HOST} !^www\.example\.com$ [NC]
RewriteRule ^(.*)$ https://www.example.com%{REQUEST_URI} [R=301,L]
Replace example.com with your actual domain.
This redirects all versions to one clean version:
http://example.com
http://www.example.com
https://example.com
to:
https://www.example.comRedirect HTTP to HTTPS and WWW to Non-WWW
If you prefer the non-www version, use this instead:
# Redirect HTTP to HTTPS and www to non-www
RewriteEngine On

RewriteCond %{HTTPS} off [OR]
RewriteCond %{HTTP_HOST} ^www\.example\.com$ [NC]
RewriteRule ^(.*)$ https://example.com%{REQUEST_URI} [R=301,L]
This redirects all versions to:
https://example.comChoose either the WWW or non-WWW version. Do not use both rules together, because that can create a redirect loop.
WordPress Users: Update These Settings
If your website uses WordPress, you should also update your WordPress URLs after enabling HTTPS.
Go to:
WordPress Dashboard > Settings > GeneralThen update:
WordPress Address (URL): https://example.com
Site Address (URL): https://example.com
Use your correct preferred domain. If your site uses www, include it. If your site uses non-www, do not include www.
After saving, log in again if WordPress logs you out.
Update Internal Links After Moving to HTTPS
After enabling HTTPS, check your internal links. Older websites often include hard-coded HTTP links in:
- Blog posts
- Menus
- Footer links
- Images
- Buttons
- CSS files
- JavaScript files
- Elementor templates
- Theme options
- Header and footer builders
If your page loads with HTTPS but some images or scripts still use HTTP, the browser may show a mixed content warning.
How to Fix Mixed Content Issues
Mixed content happens when an HTTPS page loads some files using HTTP.
For example:
https://example.comloads an image from:
http://example.com/image.jpgTo fix this, update old HTTP links to HTTPS.
Common Fixes
- Replace old HTTP URLs inside WordPress content.
- Update image URLs in page builders.
- Update theme settings.
- Update custom CSS background images.
- Update hard-coded links in header and footer files.
- Clear cache after making changes.
For WordPress, you can also use a search-and-replace plugin carefully. However, always back up the database first.
Cloudflare or Proxy Redirect Loop Fix
If your website uses Cloudflare, a load balancer, or a reverse proxy, you may sometimes see a redirect loop.
This can happen when your server sees the request as HTTP even though the visitor is using HTTPS through Cloudflare.
For Cloudflare users, check these settings:
- SSL/TLS mode should usually be Full or Full (Strict).
- Avoid using Flexible SSL if your origin server has an SSL certificate.
- Clear Cloudflare cache after changing redirect rules.
In some proxy setups, your host may require a different condition such as:
RewriteEngine On
RewriteCond %{HTTP:X-Forwarded-Proto} !https
RewriteRule ^(.*)$ https://%{HTTP_HOST}%{REQUEST_URI} [R=301,L]
Use this only if your hosting provider or proxy setup requires it.
How to Test Your HTTPS Redirect
After adding the rule, test the redirect carefully.
Manual Browser Test
Open these URLs in an incognito window:
http://example.com
http://www.example.com
https://example.com
https://www.example.com
Make sure each one goes to your preferred final HTTPS version.
Command Line Test
You can also test with this command:
curl -I http://example.comA good result should show a 301 redirect, similar to:
HTTP/1.1 301 Moved Permanently
Location: https://example.com/
Google also recommends testing redirects during site moves and keeping redirects active for a long time so signals can transfer correctly.
Common Mistakes to Avoid
1. Using Temporary Redirect Instead of 301
Do not use only [R,L] when your goal is a permanent HTTPS migration. Use:
[R=301,L]This makes the redirect permanent.
2. Adding Duplicate Redirect Rules
Too many redirect rules can conflict with each other. Keep your .htaccess file clean and avoid repeating similar HTTPS rules in multiple places.
3. Mixing WWW and Non-WWW Rules
Choose one preferred version:
https://www.example.comor:
https://example.comDo not force both at the same time.
4. Forgetting WordPress URL Settings
If WordPress still uses HTTP in the General Settings page, you may continue to see login issues, mixed content, or redirect problems.
5. Not Clearing Cache
After editing .htaccess, clear all cache layers:
- WordPress plugin cache
- Hosting cache
- CDN cache
- Browser cache
Recommended .htaccess Placement
For WordPress websites, the HTTPS redirect rule should usually be placed before the default WordPress rules.
Example:
# Redirect all HTTP traffic to HTTPS
RewriteEngine On
RewriteCond %{HTTPS} off
RewriteRule ^(.*)$ https://%{HTTP_HOST}%{REQUEST_URI} [R=301,L]

# BEGIN WordPress
# WordPress rules appear here
# END WordPress
This helps Apache process the HTTPS redirect before WordPress handles the request.
Final Checklist
Before you finish, confirm these items:
- SSL certificate is active.
- HTTP redirects to HTTPS.
- Redirect uses 301 status.
- WordPress URLs use HTTPS.
- WWW or non-WWW version is consistent.
- Sitemap uses HTTPS URLs.
- Canonical tags use HTTPS.
- Important images and scripts load with HTTPS.
- No mixed content warnings appear.
- Google Search Console has the HTTPS version verified.
FAQs About HTTP to HTTPS Redirects
What is the best way to redirect HTTP to HTTPS?
For Apache servers, the best method is usually a 301 redirect inside the .htaccess file. This tells browsers and search engines that the HTTPS version is the permanent version.
Should I use 301 or 302 for HTTPS redirects?
Use 301 for a permanent HTTPS migration. A 302 redirect is temporary and is not ideal when your goal is to make HTTPS the main version of your website.
Where is the .htaccess file located?
The .htaccess file is usually in the root directory of your website. In WordPress, this is the same folder that contains wp-config.php, wp-content, and wp-admin.
Can a wrong .htaccess rule break my website?
Yes. A wrong rule can cause a 500 error or redirect loop. That is why you should always back up the file before editing.
Do I still need an SSL certificate?
Yes. The redirect only sends visitors to HTTPS. It does not create SSL. You must install and activate a valid SSL certificate first.
Why is my website showing a mixed content warning?
Mixed content usually means the page loads with HTTPS, but some images, scripts, fonts, or stylesheets still use HTTP. Update those URLs to HTTPS and clear your cache.
Is this method only for WordPress?
No. This method works for many Apache-based websites. However, WordPress users should also update WordPress Address and Site Address settings.
Final Thoughts
Redirecting HTTP to HTTPS using .htaccess is a small but important step for website security, SEO, and user trust. The safest method is to install a valid SSL certificate first, back up your .htaccess file, add a proper 301 redirect rule, and then test your website carefully.
For most Apache websites, this rule is enough:
RewriteEngine On
RewriteCond %{HTTPS} off
RewriteRule ^(.*)$ https://%{HTTP_HOST}%{REQUEST_URI} [R=301,L]
After that, check WordPress settings, fix mixed content, clear cache, and confirm that every HTTP URL redirects to the correct HTTPS version.
Need help with WordPress, .htaccess, redirects, or SEO cleanup? Explore more practical tutorials on S.A. Dedar and keep your website secure, clean, and search-friendly.